 |
The
Sundial Primer created by Carl Sabanski |
|
|
The
Sundial Primer created by Carl Sabanski |
|
| The Sundial Primer Index | "Sunny Day U" Index |
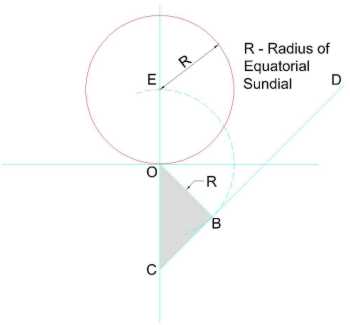
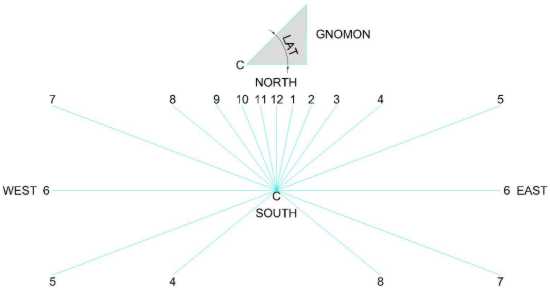
Make a Horizontal Sundial - Graphical Method Horizontal Sundial: the common or garden sundial with a horizontal dial plate and polar-pointing gnomon. The sundial you will be making is one that you can find in most garden supply shops. The difference is that this one will actually work. Give it a try! Figure 1 shows the relationship between a horizontal sundial and the equatorial sundial that is used to create it. Notice that the two sundials have a common style or shadow casting edge that points to the celestial pole. The style is at an angle equal to the latitude relative to the face of the horizontal sundial and it is perpendicular to the face of the equatorial sundial. For this to be, the equatorial sundial is tilted at an angle equal to the co-latitude, or 90°-latitude, relative to the face of the horizontal sundial. This dial is designed for the Northern Hemisphere and the style must point to the North Celestial Pole (True North) or Polaris. To design a sundial for the Southern Hemisphere you need to reverse the numbering of the hours. Instead of the hour numbers going from 6 a.m. to 6 p.m. in the clockwise direction they will go from 6 a.m. to 6 p.m. in the counterclockwise direction. Also the style must point to the South Celestial Pole (True South). This sundial will tell solar time but not clock time. You must learn about longitude correction and the Equation of Time to correct your sundial reading so that it will give you clock time.
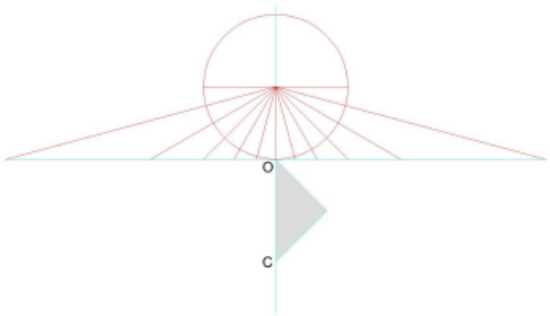
Figure 1: Horizontal Sundial (CAD) It would be difficult to project the hour lines of the equatorial sundial shown in Figure 1 on to a horizontal plane to create the horizontal sundial. A graphical method is available to do this on a flat surface, your piece of paper. Follow these instructions and in no time you will have your very own horizontal sundial and it will be designed for where you live. What do you need to know? All you need to know is the latitude of where you live. Now let's make a horizontal sundial.
Step 1
Step 2
Step 3
Step 4
Step 5
Step 6
Step 7
Congratulations! Your sundial is now ready to use. All you need to do is find a sunny spot and find the direction of true north, that is the celestial pole. Make sure that your sundial is level and that the gnomon is pointing to the celestial pole. To find true north please go to "Finding True North" at The Sundial Primer. Happy Dialling! There are a couple of other methods that can be used to draw a sundial. The following pages will show you these methods and how you can use them to draw a horizontal sundial. They can also be used to draw a vertical sundial and if you are interested you can easily figure that out. Just start with the vertical sundial page and remember that the hours a vertical south sundial can show are limited.
|